Over the last couple of days, I have been drawing a Fruit Fairy. She started off as a colourful digital sketch:
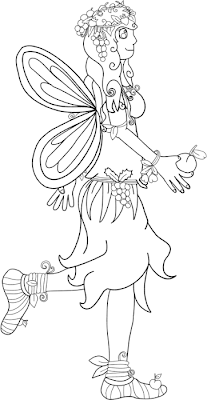
Then I tidied up the outline:
Shaded it in:
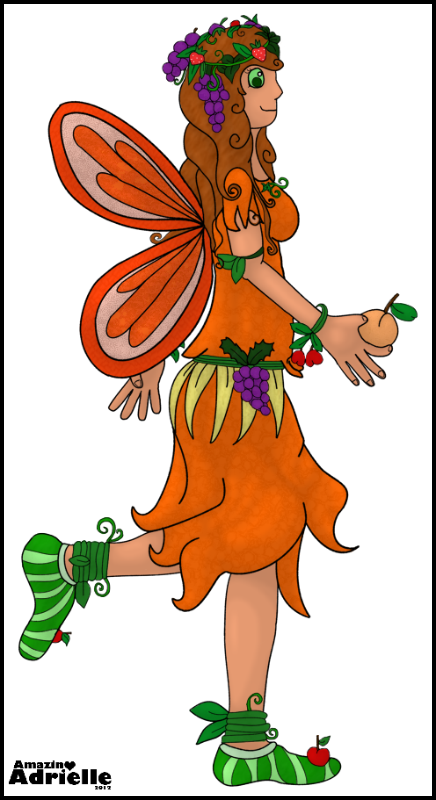
And finished it off =D
I thought I would add a short attempt at showing how I shade things using Photoshop.
Firstly, the main tools that I use are:
1. "Layer" > "New Layer"
2. The brush selection tool (mainly just to adjust the brush size, and to switch between hard-edged and fuzzy)
3. The paint brush tool
4. The eraser tool
5. The zoom tool
I start by drawing an outline with the hard-edged brush tool:
Then, I make a new layer (by going to "Layer" > "New layer" in the top bar). I drag this new layer down below the outline layer in the "Layers" tab on the right, so that it is behind the outline:
I then use the fuzzy brush tool to shade my object. I usually end up with 3 layers of shading - the first covering all but the brightest parts of my object, the second covering all but the next brightest areas, and so on. I use the colours red, orange and yellow for the shading layers, so that they are easy to see against the black outline.
In a fairy example, the red is Shading Layer 1, the orange is Shading Layer 2, and the yellow is Shading Layer 3:
So that my shading layers blend nicely, I use a filter to blur them a little. Going to "Filters" in the top bar, then selecting "Blur" > "Box blur" brings up a box that allows you to choose how blurred your layer will become, and shows you a preview. Blurring each shading layer should make the transitions between them appear more even. (Sometimes you may need to go around your outline with an eraser and tidy up if the blur has gone too far outside the lines!)
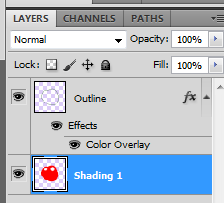
Then, with each of my three shading layers, I double click them (in the "Layers" tab on the right) to open the "Blending/Layer style" dialogue box. I select the "Color overlay" option:
Then I double click the colour box (the black rectangle above the "100%" in the example above) to bring up the colour selection dialogue, and I change the overlay colour to black (if it is not black already).
Once my layer is black, I go back to the main tab of the "Blending/Layer Styles" box, and change the "General Blending" opacity to between 5 and 20%, depending on how dark I want the shading to be.
Tip: Once you have set the opacity and overlay colour for one of your shading layers, you can right click that layer in the "Layers" tab on the right, and select "Copy layer style". Then you can right click your other shading layers and choose "Paste layer style" to save you having to set them all separately =D.
Lastly, I create a colour layer underneath the shading layers, and colour in my shape (for this apple-ish thing, I chose red).
That is how I shaded the Fruit Fairy (and the appleish thing) in Photoshop =D
~Ad =D
.jpg)
.jpg)
.jpg)
.jpg)
.jpg)
.jpg)
.jpg)
.jpg)
.jpg)
.jpg)


.jpg)
.jpg)
.jpg)
.jpg)
.jpg)
.jpg)
.jpg)
.jpg)
.jpg)
.jpg)